Text and Dialogue System
- Travis Willis
- Apr 29, 2021
- 6 min read
This video helped a lot in the creation of this system: Creating a Flexible Dialogue System With Unity 2D by Semag Games (https://youtu.be/jhwfA-QF54M) It’s very similar (and came first), but copying it perfectly did not function.
I wrote this dialogue system for a game project that sadly fizzled out of existence. It was to be a visual novel style game with mini-games where the player was a plague doctor helping nearby town residents. Its main focus was on characters and their interactions so having a way to display text and dialogue was important. I also added text effects for fun, in case we wanted to add more personality to the interactions.
GETTING THE TEXT
First I needed to get text. I made a string of all the letters we might use. A string may also be used as a character array, so I broke it out into letters and created a dictionary to something using characters as a key. I decided sprites would be the easiest “something.”
This required making a sprite sheet out of a font. It got fairly complicated as I tried to figure out the best way of doing this. Suffice it to say extracting font glyphs, importing them into a texture packer, and trying to put them in a grid was too much. Texture packing also comes with other issues. For example TextMesh Pro gives you this:

Not impossible I’m sure, but having no order in the texture made it assuredly impossible for me. What I settled on was simple. I typed it in GIMP then manipulated it into a grid.

Perfect enough. The font is hand drawn, so some of the glyphs themselves are misaligned, but I just needed a straight line between all of them.
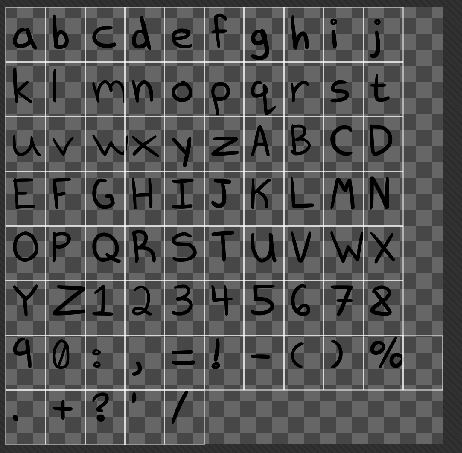
Makes slicing a sprite sheet way easier. Each sprite is a separate object, and after slicing it (the blank one on the left I’ll need to talk about.) we needed to get those sprites separated and put into the dictionary. I don’t know of an effective way to do that outside of Resource.Loadall, so that’s what I did. I also made a scriptable object to hold the font texture and a name, and any other usable data so we can swap fonts in and out or use multiples.
MAKING THE CHARACTER GLYPHS
Then the magic happens. I take each sprite, save it to a sprite array called charSprites, find the dimensions of each sprite, then saved that to the dictionary.
To find the sprite dimensions I delved into my meagre knowledge of tech art and shader programming and after much googling, I found GetPixel. The basic idea I wanted to use was to check the alpha (or solid color) or the sprite sheet if it equaled that it would move on to the next pixel going from top to bottom, left to right then right to left. I went with alpha since solid colors would need to be eliminated or like some older video games do it, made the same color as the text box.
So we code that looks like this:

Now, this caused an error at first. It took me a long time to figure out that it was the blank sprite on the left for no break spaces. I think it’s because there’s nothing IN the square, but even if I made it check for that and do something separate it would still error. So the nbsp sprite was made separately and then added to the dictionary with its own values.
Once each letter is completed, it is added through the dictionary: DialogueToCharSprites(character, CharData). CharData is a struct that holds all the information we need to draw the sprite such as the width, height and the sprite itself. This script also holds the kerning value. Something else to note is that the alphabetic string used to create the sprites has to be in the same order as the sprite sheet.
DRAWING THE TEXT TO SCREEN
Drawing text will require some text, obviously. It can be from any source as long as you can load it into Unity. We started with text fields held in scriptable objects, but we eventually wanted a solution that was editable outside of Unity. This lead to text files being serialized within scriptable objects. Eventually landing on XML files fed straight into the system. This breaks up the dialogue into lines, loads those lines into an array of strings. In turn that array is fed into a DrawText function, the current line to display is separated out (dialogueText[index]) and the displaying begins.
First we pick a starting position for our text, for us it was an offset to our text canvas then a new game object was created for the letter (Better way to do this?) its parent is set to the text canvas, the name is changed to the letter, and an image is added. This image component is then given the sprite then text scaling effects are applied (we’ll talk about this later.)
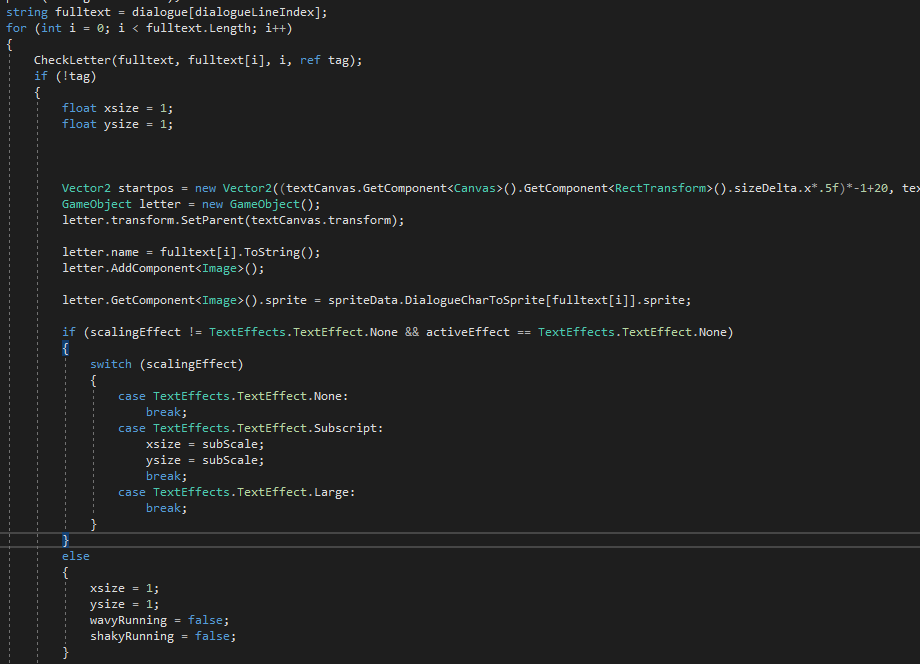
That handles the sizing, it then zeros the pivot point. The width of the text box in this case is hard coded (we did not actually get to implement this in any meaningful way) it finds the height offset based on the sprite height, and the width offset which is 0. The letters are then places in relation to the start position, the kerning value, and the sprites width. When the character reached the end (400 in this case) it shifts down by font height, zeroes the width offset, and continues.

This gets us something like:
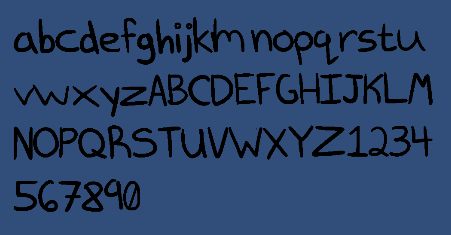
This is an earlier version though, so the L is a bit weird. I didn’t have kerning values yet. I was just celebrating that it worked after weeks of trying.
TEXT EFFECTS
As mentioned earlier I have various text effects in place, these are handled by interrupting the code and starting a coroutine that further changes the sprite and how it is drawn. If they are animated, the coroutine keeps running until text advances or is closed. For example let’s look at shaky text.
The code adds letters to a “letters” array, and those are our normal letters. If however they have a tag like <s> in front of them, the letters are added to a new array, in this case “fxletters” multiple arrays might be needed to do multiple text effects per line, or keep track of their indexes, I never got that far.
We then start a coroutine that acts on fxletters.


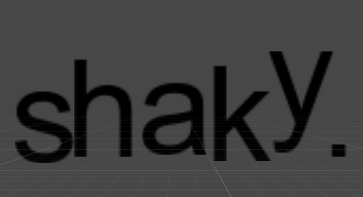
The final result looks like this
TAGS
The tags are a thing I pulled from Creating a Flexible Dialogue System With Unity 2D (https://youtu.be/jhwfA-QF54M) which is when I found the video. Retroactively applied things that work better for the project. It works something like this however:
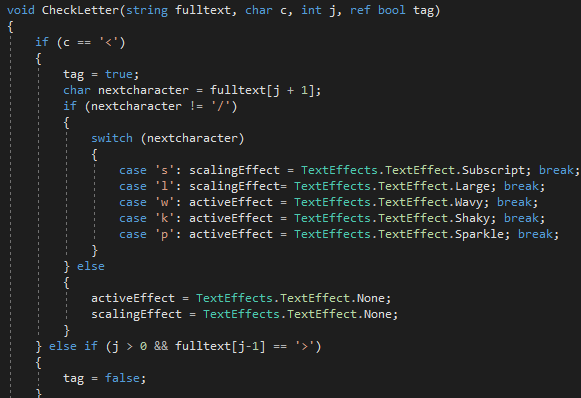
This checks each letter as it comes in, if the character is < it marks “tag” as true. It then looks at the letter within the tag and changes the texteffect state to the corresponding one. When it reaches > it falsifies tag and returns to displaying letters. These letters however are added to fxLetters, then the exit tag is found, the process repeats, however / is found, which ends the texteffect state and returns it to None. then continues to do the tag process. This removes the tag text from the actual display text.
XML
As I eventually settled on XML files for the text, we needed a system for that. Luckily this is all built in to C#, but I had to put together a useable system to make it easier. Did some testing for ways to do it, since I’m no stranger to text manipulation in code, I made this:
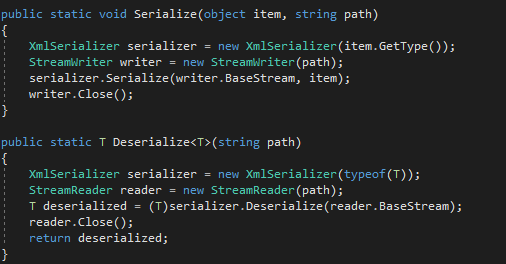
This code can be used to serialize and deserialize XML files. The writer was just used to create templates to be used for people not code-inclined, the deserializer reads the XML file into a useable format for Unity.
For our purposes it was used here:

It looks for the dialogue tag in the XML file named after the interactionID found in the XML folder. Then adds that to currentDialogue, our array of strings. It then does a mess of things outside of the scope of this document, and displays:

I never got around to word wrapping and some other polish steps before the project stopped.
I learned a lot making this happen though. If I were to continue with the project I’d like to add word wrapping, multiple text effects at a time, and a better way to animate the character sprites on the sides based on the text line.


Comments